
Create a Dataset
Unlock the power of data transformation with Datasets; this feature allows you to write SQL to transform your data and create custom or calculated fields, even without direct access to Snowflake, enabling Marketers to drive personalized campaigns with ease and precision.
Interested in using Datasets?Reach out to your account manager to get started.
Create a new dataset
Datasets define Views in the underlying Snowflake that are made available for use in the Schema Builder.
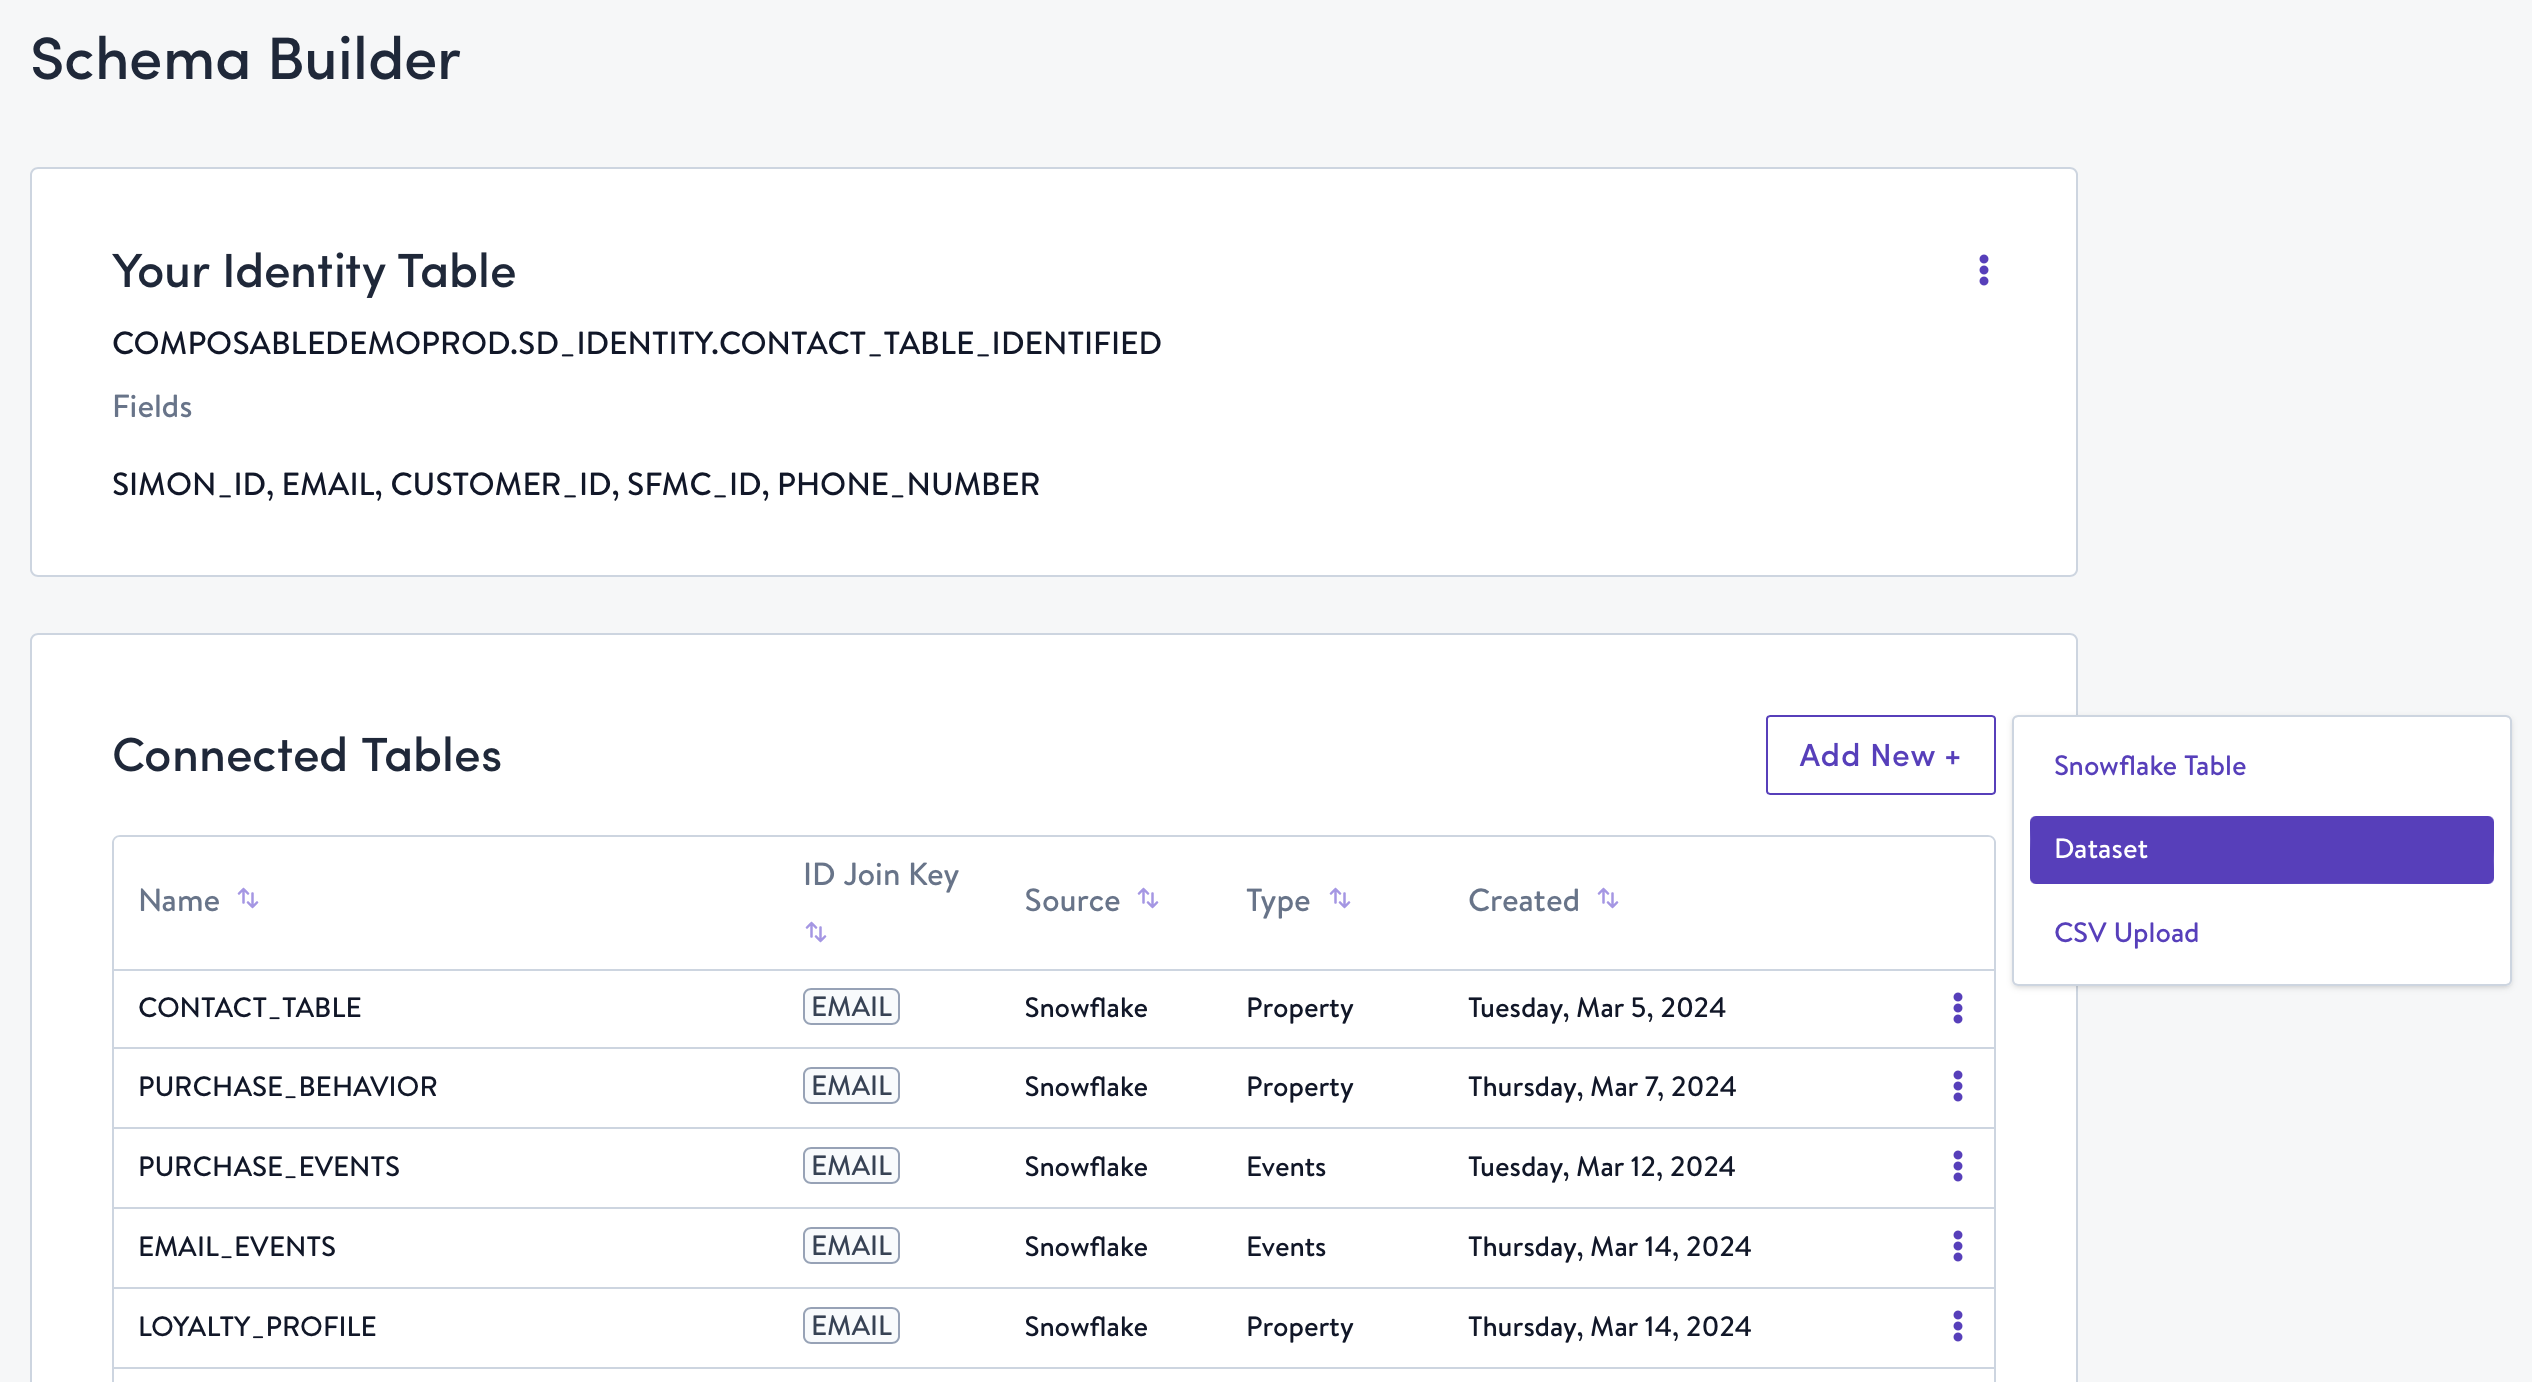
- Click on Schema Builder in the left-hand navigation bar.
- Click Add Table + at the top of the Connected Tables list, then click Dataset.
- Choose the type of data in the dataset.
- Event Data: 1:many with a customer (e.g. page views, add-to-cart events, etc.)
- Property Data: 1:1 with a customer (e.g. birthday, LTV, orders placed, etc.)
- Lookup Data: data that is not directly tied to a customer (e.g. product catalog)
- Configure the dataset (note: this applies to both Event and Property datasets).
- Name the dataset. A database friendly version of this name will appear in the Schema Builder as well as in Snowflake.
- Select Database Query as the source (note: in the future we will provide the ability to upload CSVs here).
- Select your Snowflake database.
- Click Start.
- You are now in the self-service SQL editor. You will see your database schema in the lower left-hand quadrant.
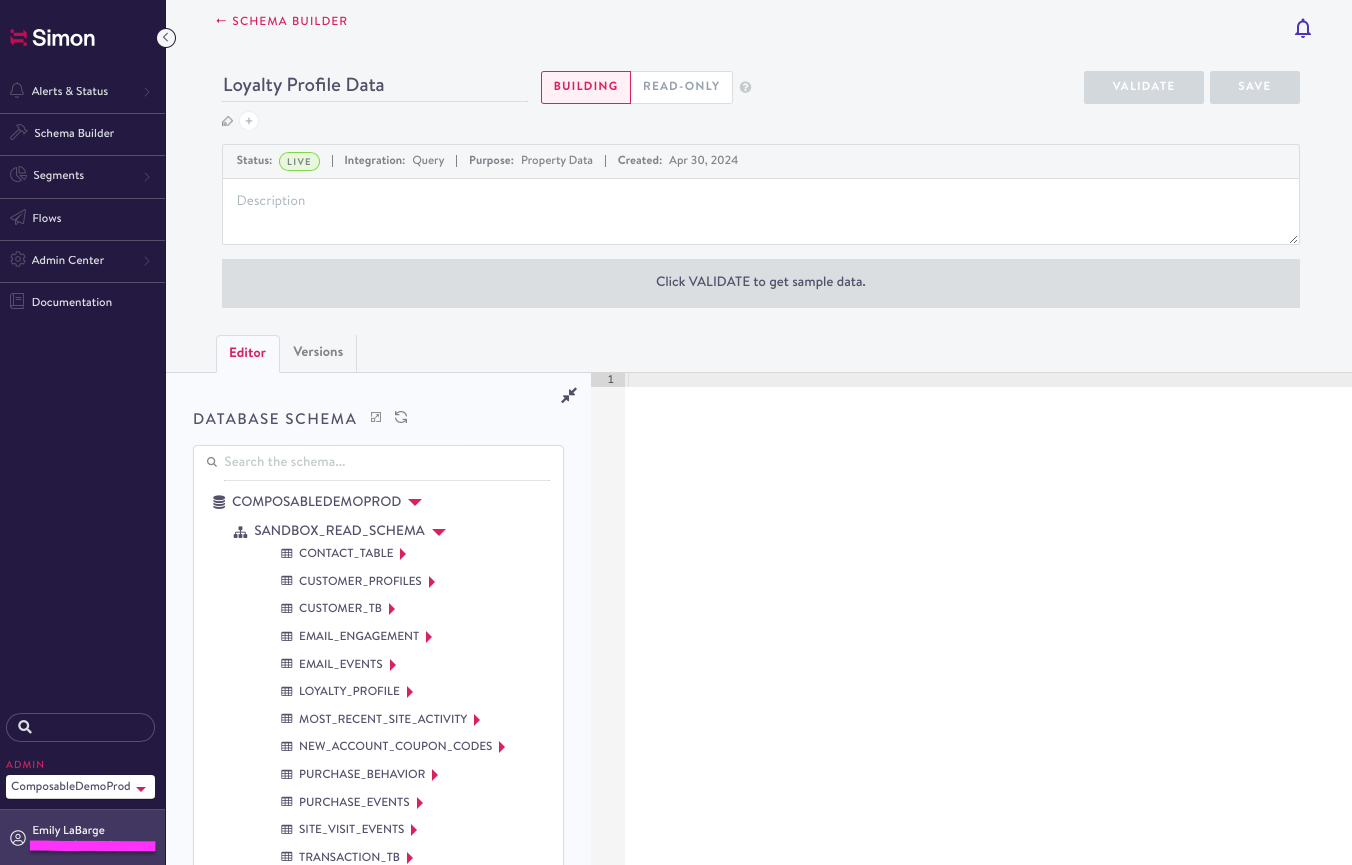
- Add a Description of the dataset if you'd like. This can be done at the top, right underneath the dataset name and configuration details.
- Write your query, then click Validate.
FOR EVENT DATASETS ONLY:If you're writing a query for Event Data, you must include a timestamp field. You will be asked to configure this later.
- Clear up any validation or syntax errors if necessary (e.g. trailing semicolons, misspelled column names, etc.).
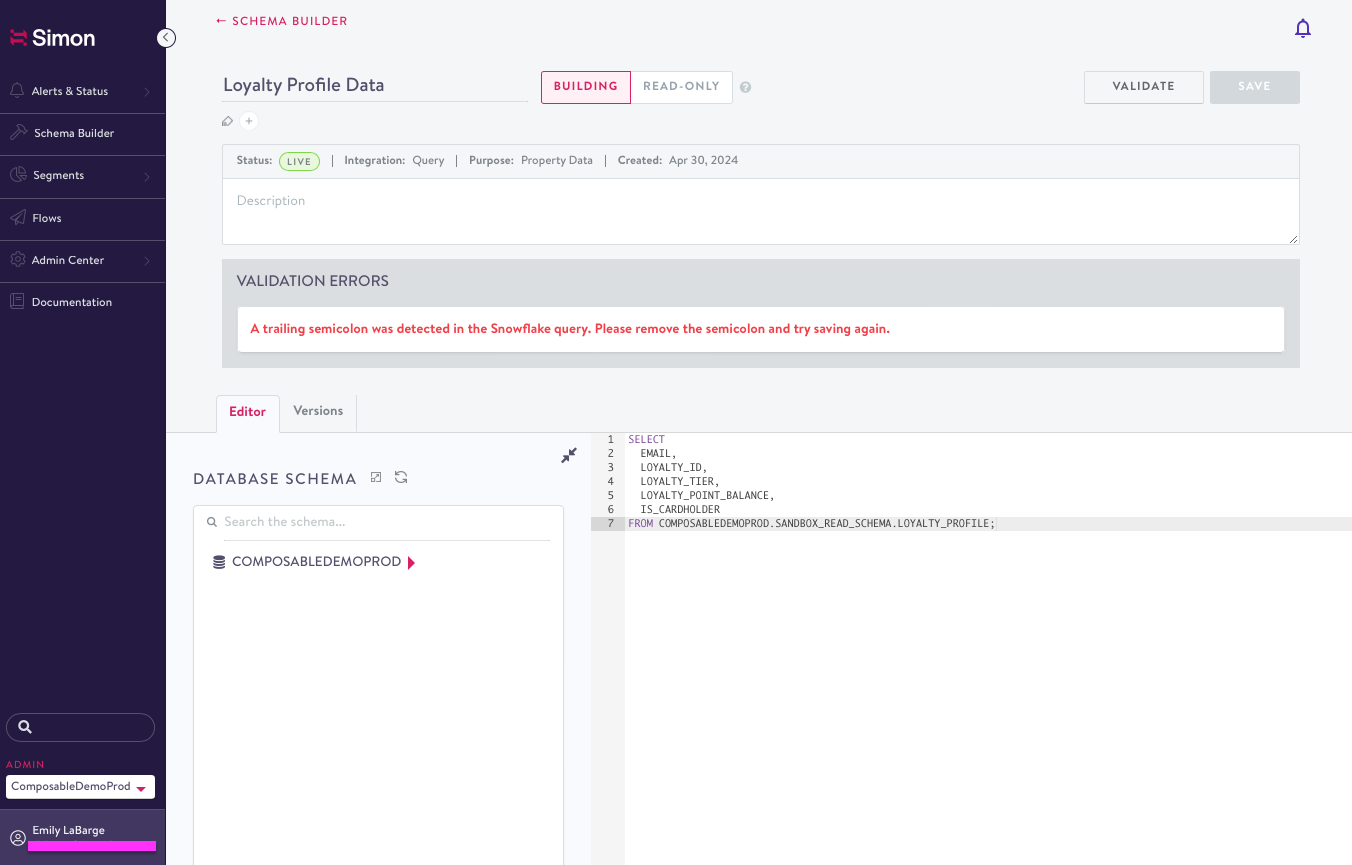
- Once validated, a sample of the data will appear. If the preview of the output matches your expectations, click Save Draft, then click Commit.
- Upon committing your dataset, you will be asked to connect the Snowflake view you just created to Simon via the Schema Builder. If you skip this step, you will not be able to use any of the fields in the dataset in segmentation or personalization.
- The first section shows the Data Type (i.e. Events or Property), Table Location, and Table Name of the dataset you just created. These fields are not editable once a dataset has been committed and a view has been created in the underlying Snowflake. If you need to make a change here, you must first disconnect the query from the Schema Builder and create the dataset again with the proper configuration.
FOR EVENT DATASETS ONLY:You will be asked to specify the Timestamp Key here. Select the timestamp field you included in your query from the dropdown.
FOR LOOKUP TABLES ONLY:Because lookup tables don't contain PII, marketing channel identifiers, or any other data that's directly tied to your customers, you need to configure a Lookup Key rather than a join key.
Once you've committed your lookup query, you will be redirected so you can configure your lookup key. This is the primary key for your table. For example, if you've created a product catalog your lookup key is most likely a
Product_ID.After choosing your lookup key, click Save. You will be redirected to the Schema Builder, where you can see your newly connected or created lookup tables in the Lookup Tables section of the page.
- Choose your join key. This is how Simon will join the data in the new view in Snowflake to the Identity table powering your Simon instance.
- The identifiers you select here must be the same. For example, if you select
emailas the join key in your identity table, you must also selectemailin your new table. It's okay if the column names are different (e.g.emailversusemail_address), but the underlying values must match. - For Property Datasets, it's always expected that there is only 1 row per unique identifier value (e.g. one
email_addressshould only have onefirst_name), whereas for Event Datasets the identifier tells us how each event relates to a contact's profile (e.g.email_address1has 5page_views).
- The identifiers you select here must be the same. For example, if you select
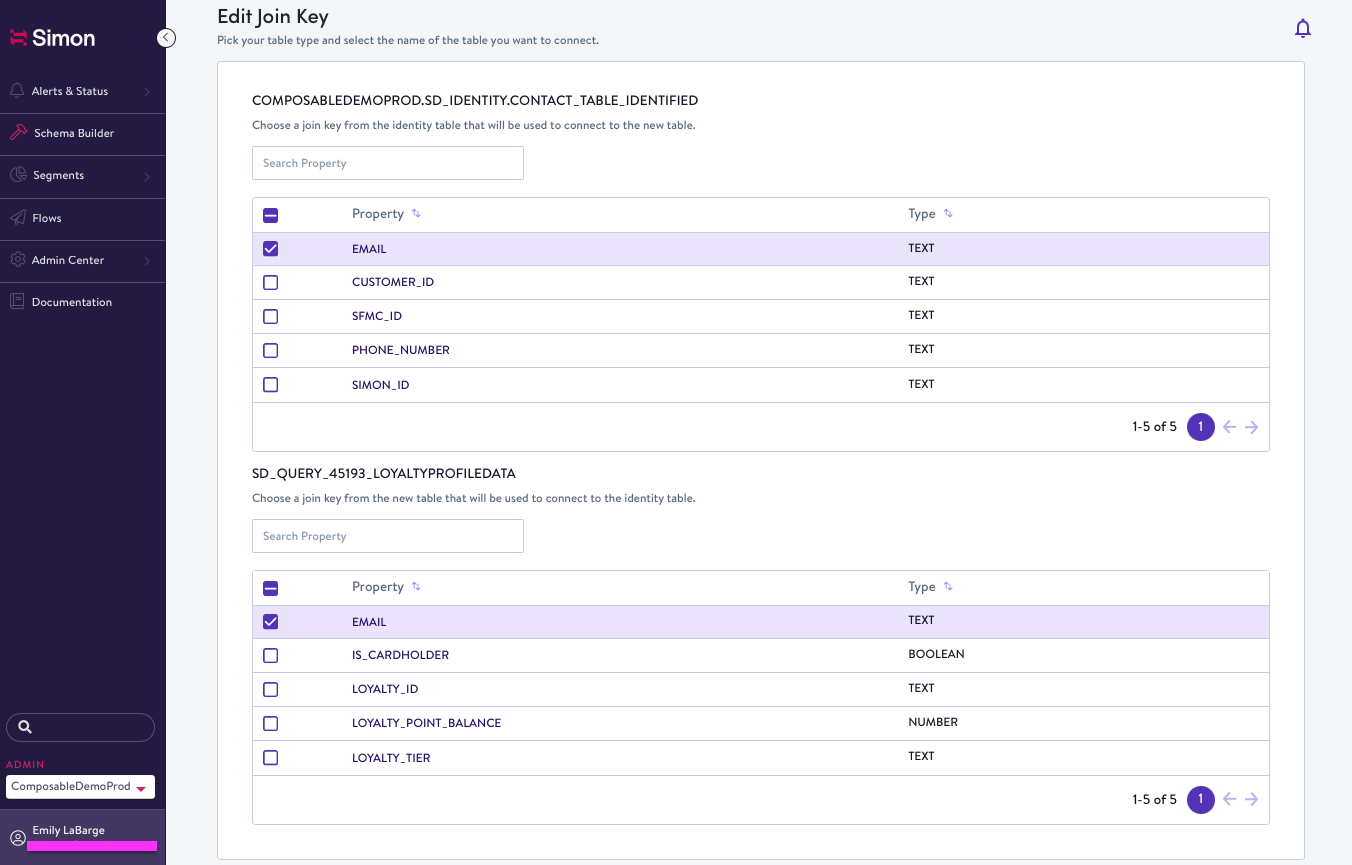
FOR PROPERTY DATASETS ONLY:After choosing a join key, you will be asked to select the fields (if any) you'd like to be made available for use in content personalization.
For example, maybe you'd like to include the value for the
LOYALTY_POINT_BALANCEfield shown in the screenshot below in emails to your customers.
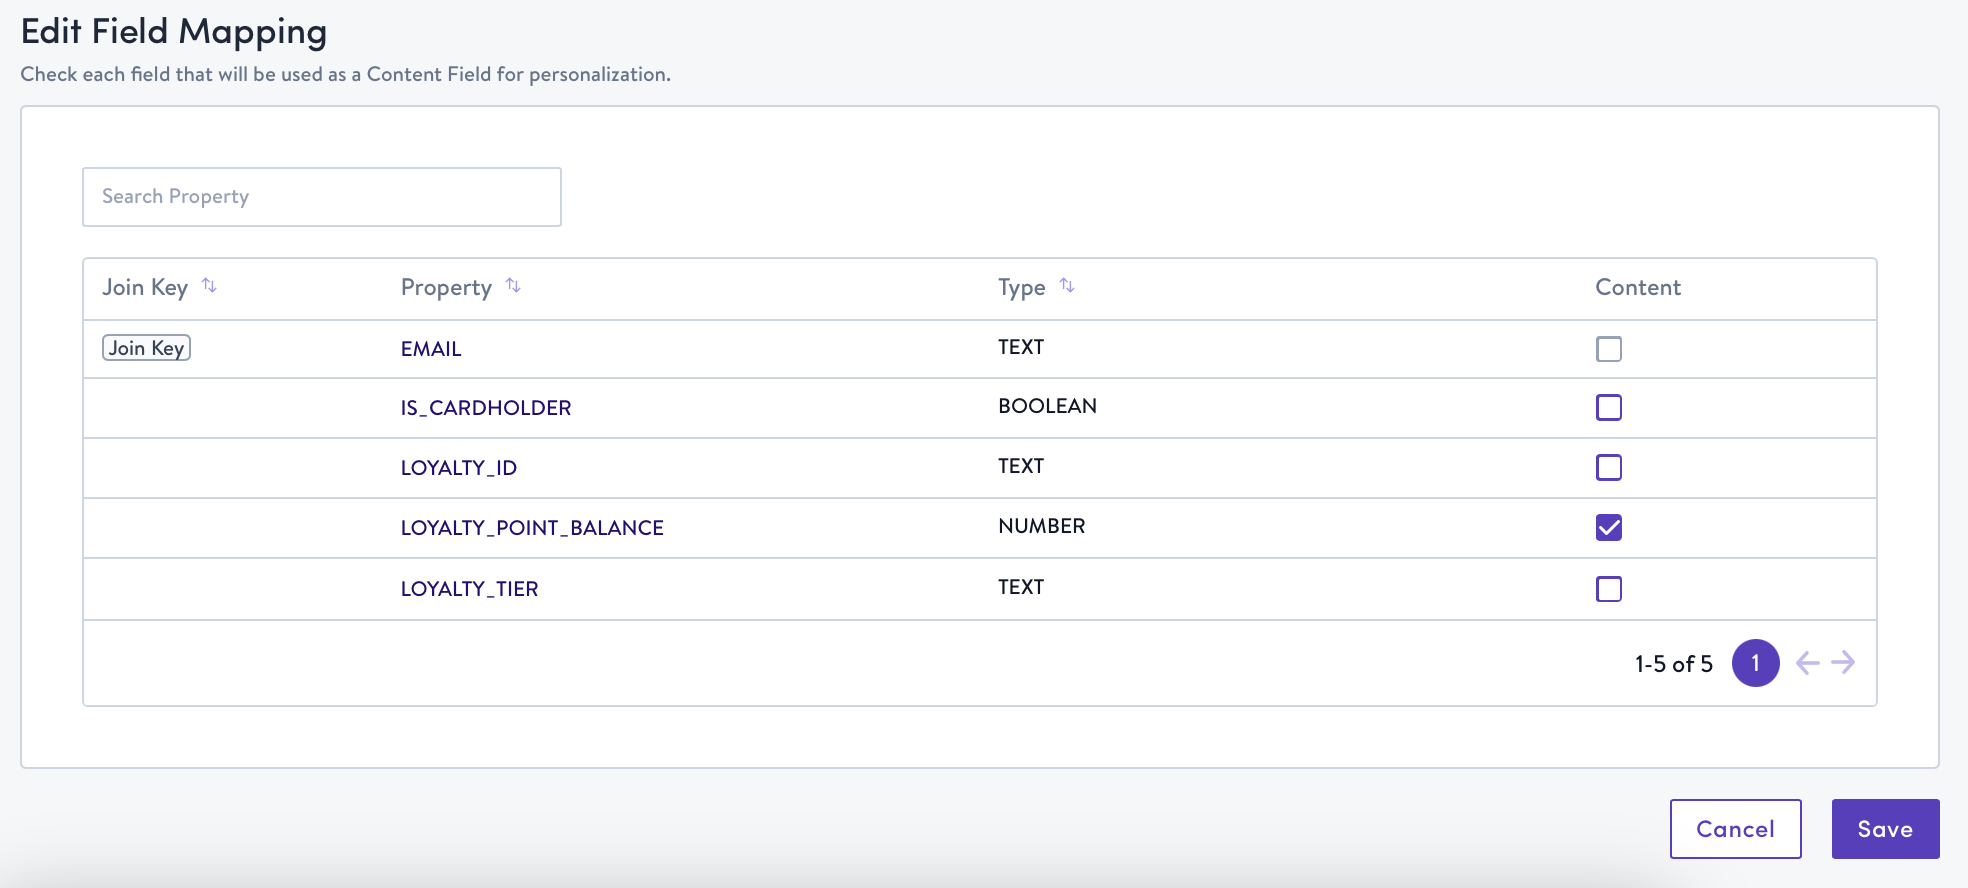
- Click Save.
- You will be redirected to the Schema Builder, where you can see your newly created and connected query at the bottom of the Connected Tables section!
On a Managed deployment?If you have a Managed Simon Data deployment, your account is limited to 50 Simon credits generated by the Datasets product. If you require more usage, talk to your account manager.
Edit an existing dataset
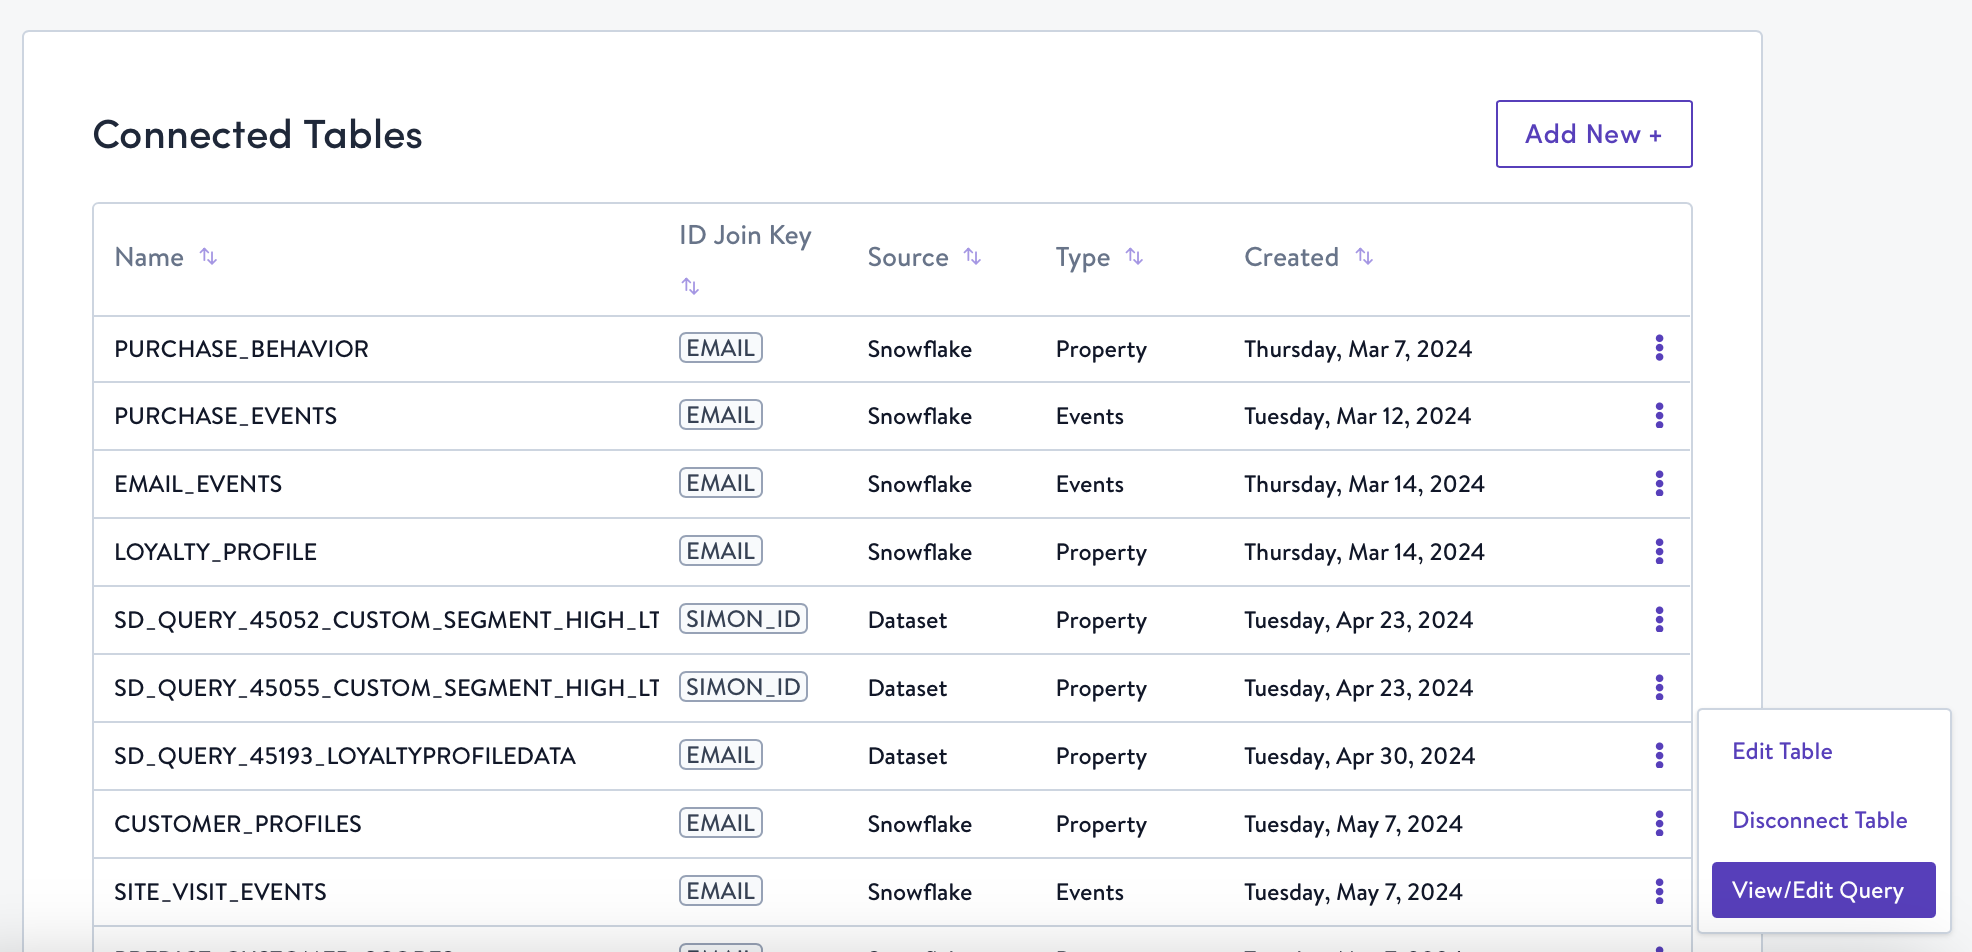
- Click on Schema Builder in the left-hand navigation bar.
- Find the dataset you want to modify, click the three dots on the right, and click View / Edit Query.
- Adjust your query to include additional fields. You can see your database schema on the lower left-hand side of the SQL editor for reference.
NOTE:We only support adding new fields to your query. If you need to remove or rename fields, contact your account manager.
- Click Validate, and clear up any validation or syntax errors if necessary (e.g. trailing semicolons, misspelled column names, etc.)
- Click Save.
- If necessary, adjust your join key and/or content fields.
Updated 18 days ago